
Historic building restoration materials help preserve original craftsmanship while meeting today’s safety and performance standards. Choosing the right materials—lime mortar, natural stone, reclaimed wood, or heritage plasters—keeps buildings strong, breathable, and historically accurate.
At Bourgeois Materials, we help conservators and architects source authentic materials verified for compatibility, safety, and provenance. Our team connects preservation standards with reliable suppliers and modern restoration technology.
This guide explains how to identify, test, and apply restoration materials that respect historic integrity while extending the life of every structure.
Choose materials that protect the building’s fabric, match original performance, and meet preservation rules. Focus on durability, breathability, and visual match while following the right standards and documentation.
Select materials that match the original in function and behavior, not just appearance. For example, use lime-based mortar where the original is lime, since it moves with masonry and lets moisture escape. Pick timber species that match the original grain and shrinkage patterns to avoid new stresses on joints.
Test existing materials first. Analyze salt, moisture, and mortar so your repairs won’t cause long-term harm. Prioritize reversible or minimally invasive treatments to keep future options open.
Balance authenticity and performance. Reclaimed bricks or matching stone can preserve the look and history, while discreet modern products may be allowed when they improve longevity without altering appearance.
Ensure new materials are chemically and physically compatible with the old ones. Incompatible mortars, like hard cement on soft brick, trap moisture and accelerate decay. Match porosity, thermal expansion, and salt tolerance to avoid hidden damage.
Test small patches of replacement stone, mortar, or plaster in situ before large-scale work. Document material sources, mix recipes, and contractors for future caretakers.
Choose breathable finishes for historic walls and avoid impermeable coatings. When exact matches aren’t available, select the closest match and note differences in treatment records.
Follow standards that guide treatment, documentation, and approvals. The Standards for the Treatment of Historic Properties and local preservation ordinances set the rules for what you can replace or alter. For federally connected projects, check 36 CFR Part 68 and related guidance for procedural requirements.
Use preservation charters and local historic commission guidelines when preparing plans. They require measured drawings, material inventories, and justification for replacements. Keeping clear records supports review by preservation boards and helps future conservation work.
Work with qualified conservation professionals. Architects and conservators who know preservation standards can turn regulatory language into practical material choices that protect historic significance and meet legal requirements.
As ArchDaily explains, strict adherence to restoration standards improves project outcomes and protects heritage assets. Certified materials—especially lime mortars and matching stone—help maintain original aesthetics while ensuring long-term stability.
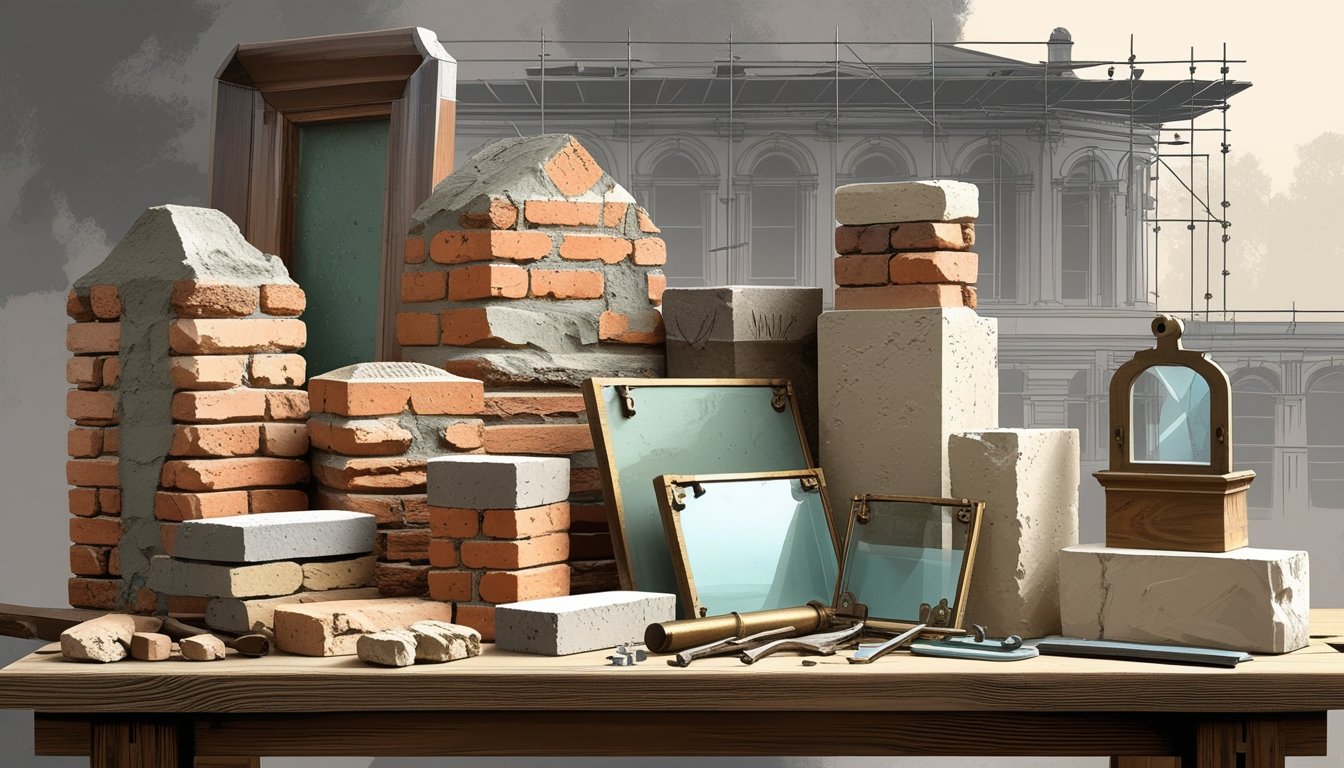
These materials help keep historic buildings sound and true to their original look. Here are practical uses, compatibility notes, and maintenance tips for common traditional materials.
Lime mortar uses lime, sand, and sometimes hair or pozzolans. It stays softer and more porous than modern cement, so it moves with old masonry and lets moisture escape. That reduces the risk of trapped water and spalling in stone or brickwork.
When you repoint or repair, match the original mortar strength and color. Use a compatible lime type (non-hydraulic or hydraulic) based on analysis of the existing mortar. Apply in thin layers and cure slowly to avoid shrinkage cracks.
Hand tooling and traditional joint profiles preserve appearance. Lime repairs may need touch-ups over decades, so plan for regular inspection.
Limestone appears across many historic buildings as ashlar, dressings, and decorative elements. It is relatively soft and reacts to environmental salts and acid rain, so you must choose a repair stone that matches grain, porosity, and mineral color.
Source matching stone from the same or similar quarries when possible. If exact matches are unavailable, use a sympathetic substitute and test it first on a small, inconspicuous area. Use lime mortar with limestone to ensure physical compatibility and avoid harder cement mortars that can cause cracking.
Clean gently with low-pressure water and soft brushes. Use conservation-grade consolidants only when needed. Record the stone type, source, and interventions for future caretakers.
Reclaimed wood preserves original grain, patina, and species that may no longer be readily sourced. Use it for structural beams, floorboards, trims, and doors to retain authentic character.
Inspect reclaimed timber for rot, insect damage, and hidden fixes like spikes or plates. Work with a supplier who can document origin and drying history. Treat only as needed with conservation-grade preservatives and avoid over-treatment that changes appearance.
Fit reclaimed pieces carefully: resaw or scarf joints to meet modern load and safety standards while keeping visible surfaces intact. Label and photograph each piece for future repairs.
Traditional plasters use lime, sand, and sometimes animal hair or earth. They bond well to historic masonry and let walls breathe. That breathability helps control moisture and reduces salt buildup on surfaces.
For internal and external work, choose a compatible plaster mix and layering method: base coat, scratch coat, and lime finish coat. Avoid cement-based renders on soft masonry. For finishes, use mineral paints or limewash that allow vapor permeability and provide authentic matte textures.
Repair small areas with matching mixes and textures to blend visually. Document decorative plasterwork profiles and moldings before repair so replacements match the original craft.
Modern materials add strength, reduce maintenance, and match old finishes while staying reversible when possible. Focus on materials that let you match appearance, control moisture, and protect structure for decades.
Advanced composites like carbon fiber-reinforced polymers (CFRP) and glass fiber-reinforced polymers (GFRP) give high strength with low weight. Use them to reinforce beams, lintels, and masonry straps where you cannot add bulky steel.
They bond to stone, brick, or timber with thin adhesive layers, so you preserve profiles and sightlines. When matching historic masonry, choose composites with textured or painted finishes that mimic mortar joints and stone color.
Composites resist corrosion and limit added load, so your repairs last longer without harming the original fabric. Check for compatibility with vapor movement; some composites can trap moisture, so pair them with breathable mortars or moisture-management layers.
Practical tips:
Epoxies and polyurethanes serve different roles: epoxy gives structural bonding and crack injection strength; polyurethane offers flexible sealing and moisture resistance. Use epoxy injections to stitch cracked stone or concrete where you need a strong, nearly rigid repair.
Polyurethane sealants work well for window frames, joints, and where movement occurs. Choose neutral-cure silicones or breathable polysulfide where the substrate needs vapor exchange.
Always use a primer if the manufacturer recommends it, and avoid rigid sealants on materials that expand with temperature.
Checklist for selection:
Modern roofing materials include fiber-cement slate, high-performance metal panels, and recycled polymer slates that match historic shapes. These options reduce weight and maintenance while keeping traditional profiles.
For facades, thin stone veneers and GFRC (glass-fiber reinforced concrete) panels recreate carved details with less mass and easier installation. Use breathable underlays and ventilated cavities to protect masonry from trapped moisture.
When matching material, sample the exact color, texture, and joint pattern. For historic brick or stone, consider lime-based repair mortars and custom-fired bricks to match porosity and appearance.
Practical choices:
You need exact material matches, reliable suppliers, and clear records to keep the building authentic and code-compliant. Focus on physical samples, trusted sources for reclaimed items, and paperwork that proves provenance and meets local rules.
Start with small, physical samples taken from non-visible areas to find the original mortar, paint, wood species, or metal alloy. Have a conservation expert run simple tests: paint cross-sections, mortar petrography, or wood identification. Match grain, color, density, and tool marks rather than only visual appearance.
Create a short checklist for each element:
Use the checklist on-site to compare old and new pieces. For structural parts, confirm mechanical properties, such as compressive strength for masonry. This prevents mismatched replacements that can harm historic fabric.
Look for specialty suppliers who reproduce period profiles, hardware, and moldings. Ask for material data sheets and photos of previous projects. Reclaimed wood and salvaged fixtures often give the best match for patina and age, but inspect them for rot, insect damage, and moisture history.
When buying reclaimed items:
If a supplier reproduces brick or millwork, verify sample batches before ordering large quantities. Keep one or two trusted vendors for repeatable quality.
Record every purchase, test, and conversation in a single folder or digital log. Include invoices, supplier certifications, lab reports, photos of samples, and location maps showing where original samples came from.
This documentation helps with grant applications, heritage permits, and future conservation work.
Check local heritage rules and building codes early. Note any required approvals, listed-material restrictions, or testing standards. If a material differs from the original, document the reason and approval source. Clear records protect you legally and preserve the restoration’s credibility.
Learn practical steps for repairing stone, brick, and wood, gentle cleaning methods that avoid damage, and routine checks that keep materials sound. Use the right tools and products for each task.
When restoring masonry, use hand tools to remove loose or failing mortar. Choose a mortar that matches the original in composition and color—often lime-based for older brick and stone. Mix small batches and apply in layers, letting each cure before adding more.
Tool the joints to match the original profile and keep mortar recessed or flush for a consistent look.
Assess wood for rot and insect damage, and retain as much original timber as possible. Use epoxy consolidants for small decayed areas and splice in new wood where structural sections are lost. Match grain and species when replacing pieces.
Fasten with stainless-steel or hot-dipped galvanized hardware to prevent corrosion. Prime bare wood and use breathable paints or stains so moisture can escape.
Restoration experts can handle structural work, historic finishes, or matching rare materials. They test existing fabric, recommend compatible materials, and document methods for future projects.
Start cleaning with dry brushing and vacuuming to remove loose dirt. Test a small, hidden area before using water or chemical cleaners. For masonry, use low-pressure water (under 200 psi) and non-ionic detergents; avoid sandblasting or high-pressure washing. For delicate stone, use poultices to lift stains gently.
For painted surfaces, apply mild solvents or conservation-grade paint strippers locally and neutralize residues. Remove moss and algae with approved biocides, following manufacturer instructions and rinsing thoroughly.
Document each repair and cleaning step. Keep samples of removed materials and record the products and concentrations used. This helps future caretakers avoid harmful methods.
Set a maintenance schedule with seasonal checks—inspect the roof, gutters, flashings, and mortar joints in spring and fall. Look for water stains, cracked joints, peeling paint, and loose masonry. Fix small mortar cracks within months to prevent bigger problems.
Use a checklist and photograph problem areas each visit. Clean gutters and downspouts to keep water away from walls. Repaint or recoat wood every 5–10 years, depending on exposure. Replace failed sealants with breathable, compatible materials to avoid trapping moisture.
Hire restoration experts for a condition survey every 5–10 years. They provide prioritized repairs, material testing, and a maintenance plan tailored to your building.
Meet legal rules, follow published preservation standards, and work with trained specialists. These steps protect historic materials, keep your project eligible for funding, and help prevent costly mistakes.
Identify which rules apply to your building: local ordinances, state historic preservation office (SHPO) requirements, and federal laws like the National Historic Preservation Act when federal funds or permits are involved.
The Secretary of the Interior’s Standards for the Treatment of Historic Properties offer a widely used framework for repair, restoration, and rehabilitation. Follow these standards to guide decisions about retaining or replacing materials and documenting changes.
Document conditions with photos and measured drawings before work starts. File required project reviews with your SHPO or local review board early. Maintain clear records for future owners or audits.
Hire preservation consultants and conservation experts for assessments, treatment plans, and material analysis. Consultants interpret standards, prepare review packets, and coordinate with SHPOs.
Conservation experts perform lab tests, mortar analysis, paint stratigraphy, and delicate conservation treatments. Ask for credentials, project examples, and a written scope tied to standards. Consultants prepare specifications for contractors, reducing the risk of inappropriate repairs or substitutions.
Seek funding sources that require compliance, such as Historic Preservation Fund grants and state tax credit programs. These usually mandate adherence to the Secretary of the Interior’s Standards and SHPO review.
Other resources include technical guides from the National Park Service, GSA, and local commissions. For grants, prepare a checklist: owner info, project description, treatment justification, cost estimates, and before/after documentation.
Contact your SHPO or local preservation office early to confirm eligible work and reporting rules. Many preservation offices offer technical advice at low or no cost.
Historic building restoration relies on materials that respect the past while meeting modern performance needs. Authentic mortars, timbers, and stones help structures breathe, flex, and endure for generations.
At Bourgeois Materials, we support preservation professionals with guidance, verified suppliers, and custom sourcing for both traditional and modern restoration products. Our mission is to protect architectural heritage through quality and accuracy.
Contact us to source authentic restoration materials that align with conservation standards and keep history alive for the future.
This section answers practical questions about materials, identification, sourcing, period differences, matching challenges, and where to buy specialty supplies. You’ll find clear steps and examples to help plan repairs with the right materials and vendors.
Masonry: lime mortar, cut stone, and heritage brick for walls and chimneys. Use lime mortar instead of Portland cement so masonry can breathe. Wood: old-growth or reclaimed oak, pine, and cedar for framing, trim, and joinery. Epoxy consolidants repair rot without full replacement.
Plaster and lath: lime or gypsum-based plasters and wood or metal lath for historic interiors. Traditional three-coat lime plaster is common in 18th–19th century homes. Roofing: slate, clay tile, wood shingles, and historically accurate metals like lead or terne.
Synthetic slats may be used if weight or cost is a concern, but try to match the look. Glazing and metals: single-pane or wavy glass, leaded lights, and wrought or cast iron. Match profiles and finishes for windows, railings, and hardware.
Insulation: breathable options like sheep’s wool or cellulose help thermal performance and protect masonry and plaster.
Start with a survey of original materials, paint layers, and construction methods. Take photos, notes, and small samples for lab analysis if needed. Check historic documentation—original plans, photos, or conservation reports. Local archives or historical societies can help.
Conduct tests like mortar analysis, wood species ID, and paint cross-sections to confirm composition. These guide material choices. Consult specialists for advice on compatibility, durability, and code issues. Their input helps avoid harmful replacements.
Reclaim and reuse: salvage matching bricks, timber, and hardware from demolition yards or other projects. Reclaimed pieces often match patina and size. Buy in bulk and plan work phases to lower costs and allow time to find rare items.
Use compatible substitutes if they match texture, color, and performance. Confirm compatibility first. Network with local trades and preservation groups for affordable sources and leads.
Early timber-frame or colonial buildings need traditional joinery, hand-planed timbers, and lime-based mortars. Focus on wood consolidation and compatible finishes. Victorian-era buildings use molded trim, decorative plaster, and patterned brick or slate.
Match profiles and ornamentation, and source cast elements as needed. 20th-century structures may include early concrete, steel, or asbestos. Specialists may be needed for hazardous materials, and modern equivalents can preserve appearance.
Always adapt methods to the building’s original techniques and materials for compatibility.
Exact matches can be rare—original stone, old-growth timber, or hand-molded bricks may not be produced anymore. Dimension and color mismatches are common. Hidden assembly methods, like old joints or lath patterns, may only appear during work.
Unexpected findings can change material needs. Compatibility issues: modern cement, non-breathable paints, or sealants can damage historic fabric.
Test for chemical and physical match. Custom-milled moldings, reclaimed items, or hand-made tiles can be expensive and slow to source. Factor sourcing time into your schedule.
Salvage yards and architectural salvage dealers sell reclaimed wood, hardware, and fixtures. Check local listings or preservation group directories. Specialty manufacturers create replica cornices, moldings, and roof tiles. Look for firms that offer matching profiles and samples.
Historic preservation suppliers and conservation labs provide lime mortars, historic plasters, and testing services. Professional associations and local preservation offices can recommend trusted vendors.
Online marketplaces and trade forums list suppliers and reclaimed items. Always verify material specifications and request samples before purchasing.